로그인 기능 추가
계획
NEAR로 로그인할 때, near-api-js를 사용하는 로그인 버튼을 추가할 예정입니다.
다음은 로그인 워크플로우입니다.
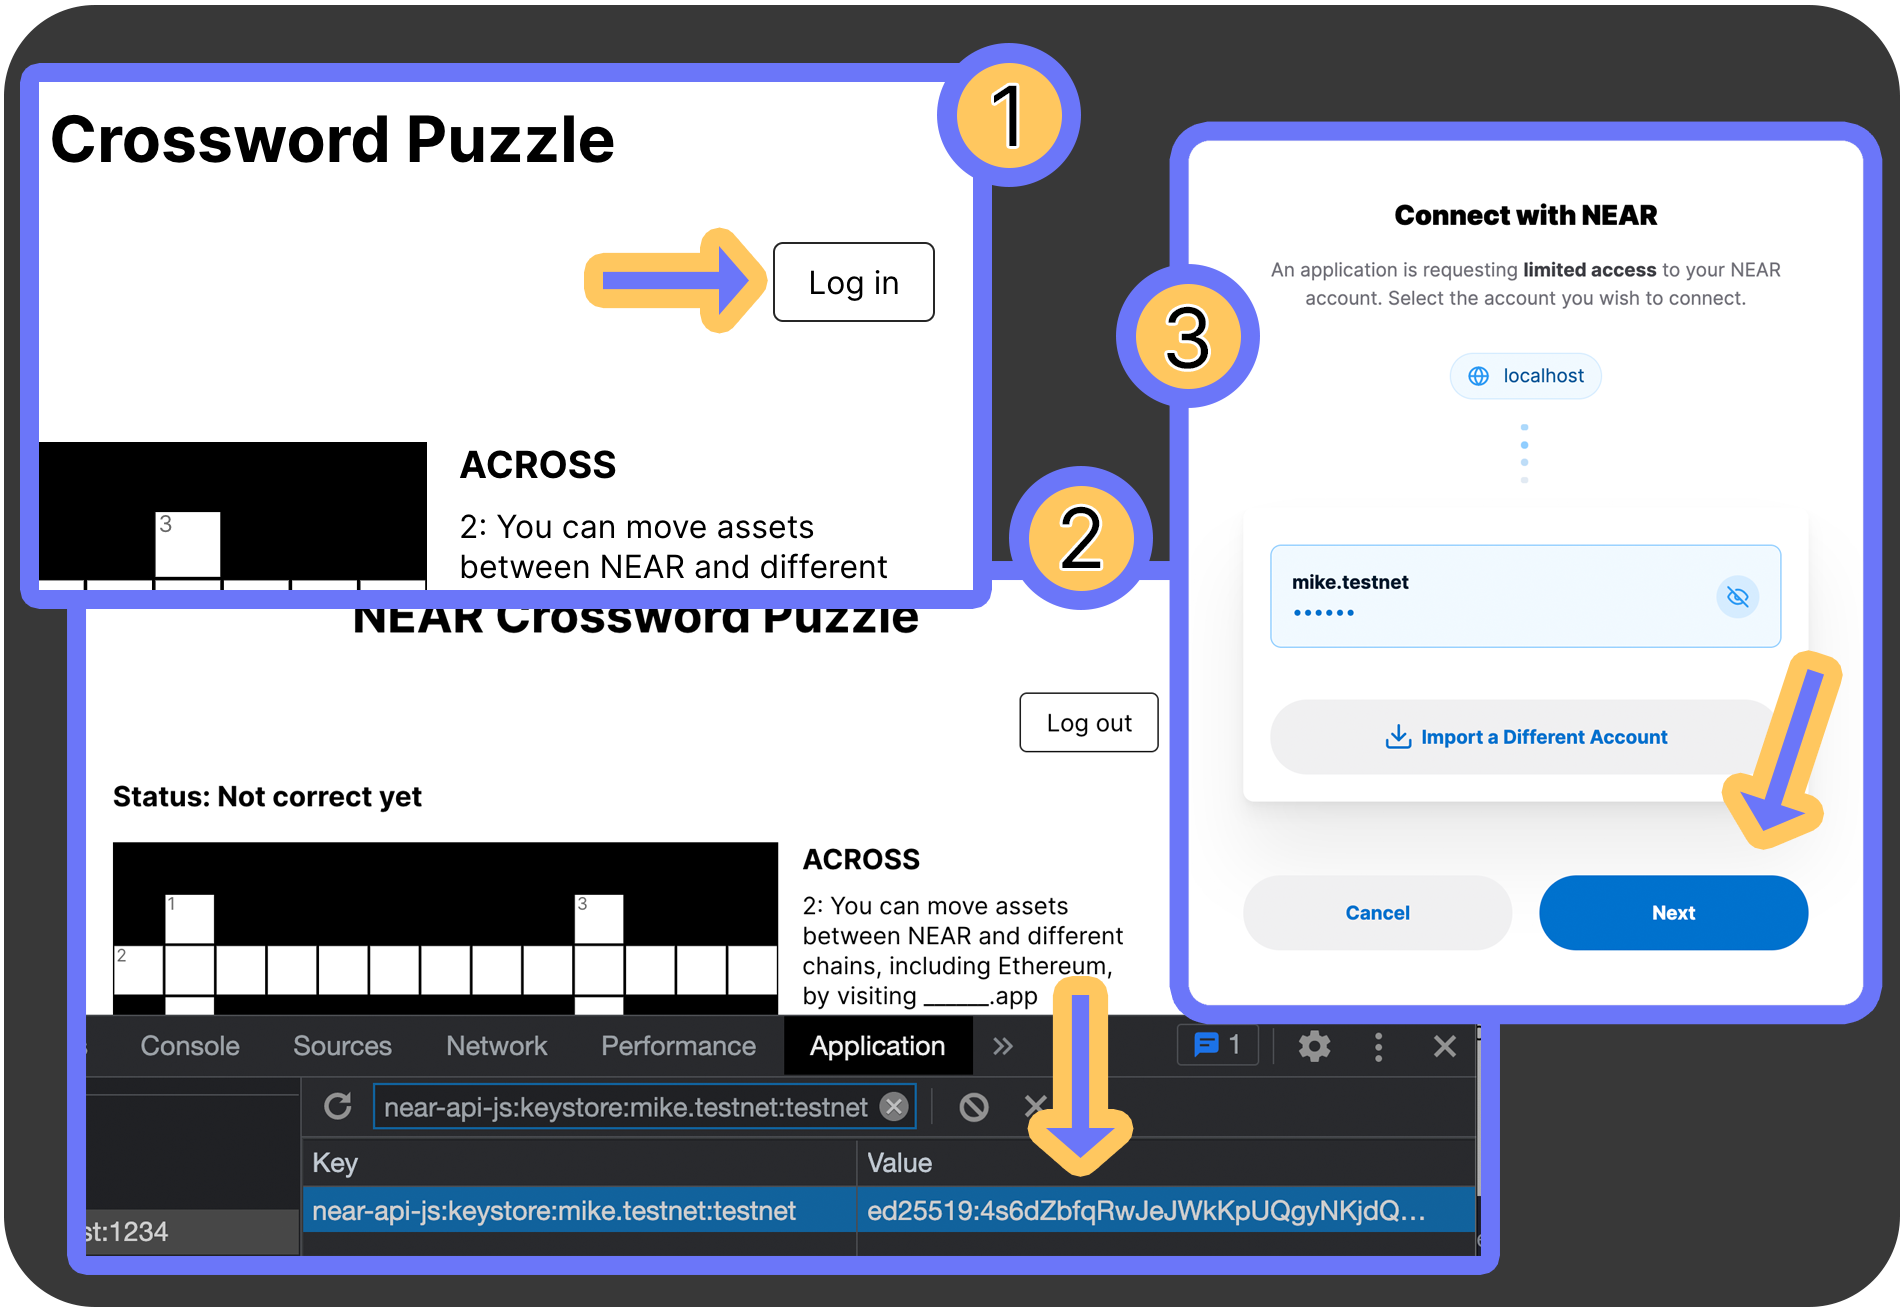
- 사용자가 로그인 버튼��을 클릭합니다.
near-api-js가 브라우저에서 개인 키를 생성합니다.- 공용 키를 전달하는 NEAR Wallet으로 리디렉션됩니다. NEAR Wallet에는
AddKeyAction이 가능한 전체 액세스 키가 있습니다. 사용자는 이를 따라 궁극적으로 새 키 생성을 승인합니다.
버튼 추가
src 디렉토리에서 다음을 확인할 것입니다:
index.jsApp.js
우리는 모든 변경 사항을 검토하지 않고 대신 새로운 로직을 작성할 것입니다.
먼저 JavaScript 라이브러리에서 WalletConnection 객체를 설정합니다.
loading...
It's then used in React:
const signIn = () => {
  walletConnection.requestSignIn(
    nearConfig.contractName,
    '', // title. Optional, by the way
    '', // successUrl. Optional, by the way
    '', // failureUrl. Optional, by the way
  );
};

const signOut = () => {
  walletConnection.signOut();
  …
};

…

return (
  <div id="page">
    <h1>NEAR Crossword Puzzle</h1>
    <div id="crossword-wrapper">
      <div id="login">
        { currentUser
          ? <button onClick={signOut}>Log out</button>
          : <button onClick={signIn}>Log in</button>
        }
      </div>
      …
    </div>
  </div>
);
Once logged in, that WalletConnection object will be tied to the logged-in user, and they'll use that key to sign transactions and interact with the contract.
You may notice, however, that sometimes you'll be redirected to NEAR Wallet, and other times you aren't.
This goes back to an earlier rule we mentioned: function-call access keys cannot send NEAR. They cannot perform the Transfer Action.
If a function call requires even 1 yoctoNEAR, NEAR Wallet (or any other wallet containing a full-access key) is required to sign the transaction. :::
JavaScript에서 컨트랙트 함수 호출
The frontend code contains a check to see if the user has completed the crossword puzzle successfully. In there we'll add logic to call the submit_solution function on the smart contract.
// Send the 5 NEAR prize to the logged-in winner
let functionCallResult = await walletConnection.account().functionCall({
  contractId: nearConfig.contractName,
  methodName: 'submit_solution',
  args: {solution: seedPhrase, memo: "Yay I won!"},
  gas: DEFAULT_FUNCTION_CALL_GAS, // optional param, by the way
  attachedDeposit: 0,
  walletMeta: '', // optional param, by the way
  walletCallbackUrl: '' // optional param, by the way
});

if (functionCallResult && functionCallResult.transaction && functionCallResult.transaction.hash) {
  // Display a link the NEAR Explorer
  console.log('Transaction hash for explorer', functionCallResult.transaction.hash)
}
These errors can be quite helpful to the developer and the end user. :::
퍼즐 가져오기, 마무리
In the previous chapter, the frontend had a hardcoded file containing information about the clues for a simple crossword puzzle. In this chapter, we've given the coordinates and details about the clues, but the frontend needs to fetch this information.
We're going to modify the logic surrounding our view-only call to get_unsolved_puzzles on the contract. This method now returns the clue information, so we've implemented a function that puts it in the proper format for React to construct the crossword puzzle.
This is a tutorial about Rust smart contract development, so we won't focus on the details of this, but know we've added the function mungeBlockchainCrossword. This allows us to keep adding custom crossword puzzles and have the frontend be dynamic.
We'll also make other minor changes like adding a page for when there are no puzzles available, and adding a loading screen.
React 앱 작동
If you've been following this guide closely, you'll likely just need to start the React app with:
env CONTRACT_NAME=crossword.friend.testnet npm run start
As a helpful reminder, below has the steps necessary to recreate the subaccount, build the contract, deploy the subaccount, and call methods on the contract:
# Go into the directory containing the Rust smart contract we've been working on
cd contract

# Build (for Windows it's build.bat)
./build.sh

# Create fresh account if you wish, which is good practice
near delete crossword.friend.testnet friend.testnet
near create-account crossword.friend.testnet --masterAccount friend.testnet

# Deploy
near deploy crossword.friend.testnet --wasmFile res/crossword_tutorial_chapter_2.wasm --initFunction new --initArgs '{"owner_id": "crossword.friend.testnet"}'
# Add the crossword puzzle
near call crossword.friend.testnet new_puzzle '{"solution_hash":"d1a5cf9ad1adefe0528f7d31866cf901e665745ff172b96892693769ad284010","answers":[{"num": 1,"start": {"x": 1,"y": 1},"direction": "Down","length": 5,"clue": "NFT market on NEAR that specializes in cards and comics."},{"num": 2,"start": {"x": 0,"y": 2},"direction": "Across","length": 13,"clue": "You can move assets between NEAR and different chains, including Ethereum, by visiting ______.app"},{"num": 3,"start": {"x": 9,"y": 1},"direction": "Down","length": 8,"clue": "NFT market on NEAR with art, physical items, tickets, and more."},{"num": 4,"start": {"x": 3,"y": 8},"direction": "Across","length": 9,"clue": "The smallest denomination of the native token on NEAR."},{"num": 5,"start": {"x": 5,"y": 8},"direction": "Down","length": 3,"clue": "You typically deploy a smart contract with the NEAR ___ tool."}]}' --accountId crossword.friend.testnet

# Return to the project root and start the React app
cd ..
env CONTRACT_NAME=crossword.friend.testnet npm run start
재미를 위해
For fun, try interacting with the smart contract using the React frontend and the CLI. We can check the status of the puzzle using the CLI, solve the puzzle with the frontend, and check the status again.
Before and after solving the puzzle, run this command:
near view crossword.friend.testnet get_puzzle_status '{"solution_hash": "d1a5cf9ad1adefe0528f7d31866cf901e665745ff172b96892693769ad284010"}'
This will return our enum PuzzleStatus. Before solving the puzzle it should print:
'Unsolved'
and after:
{ Solved: { memo: 'Yay I won!' } }
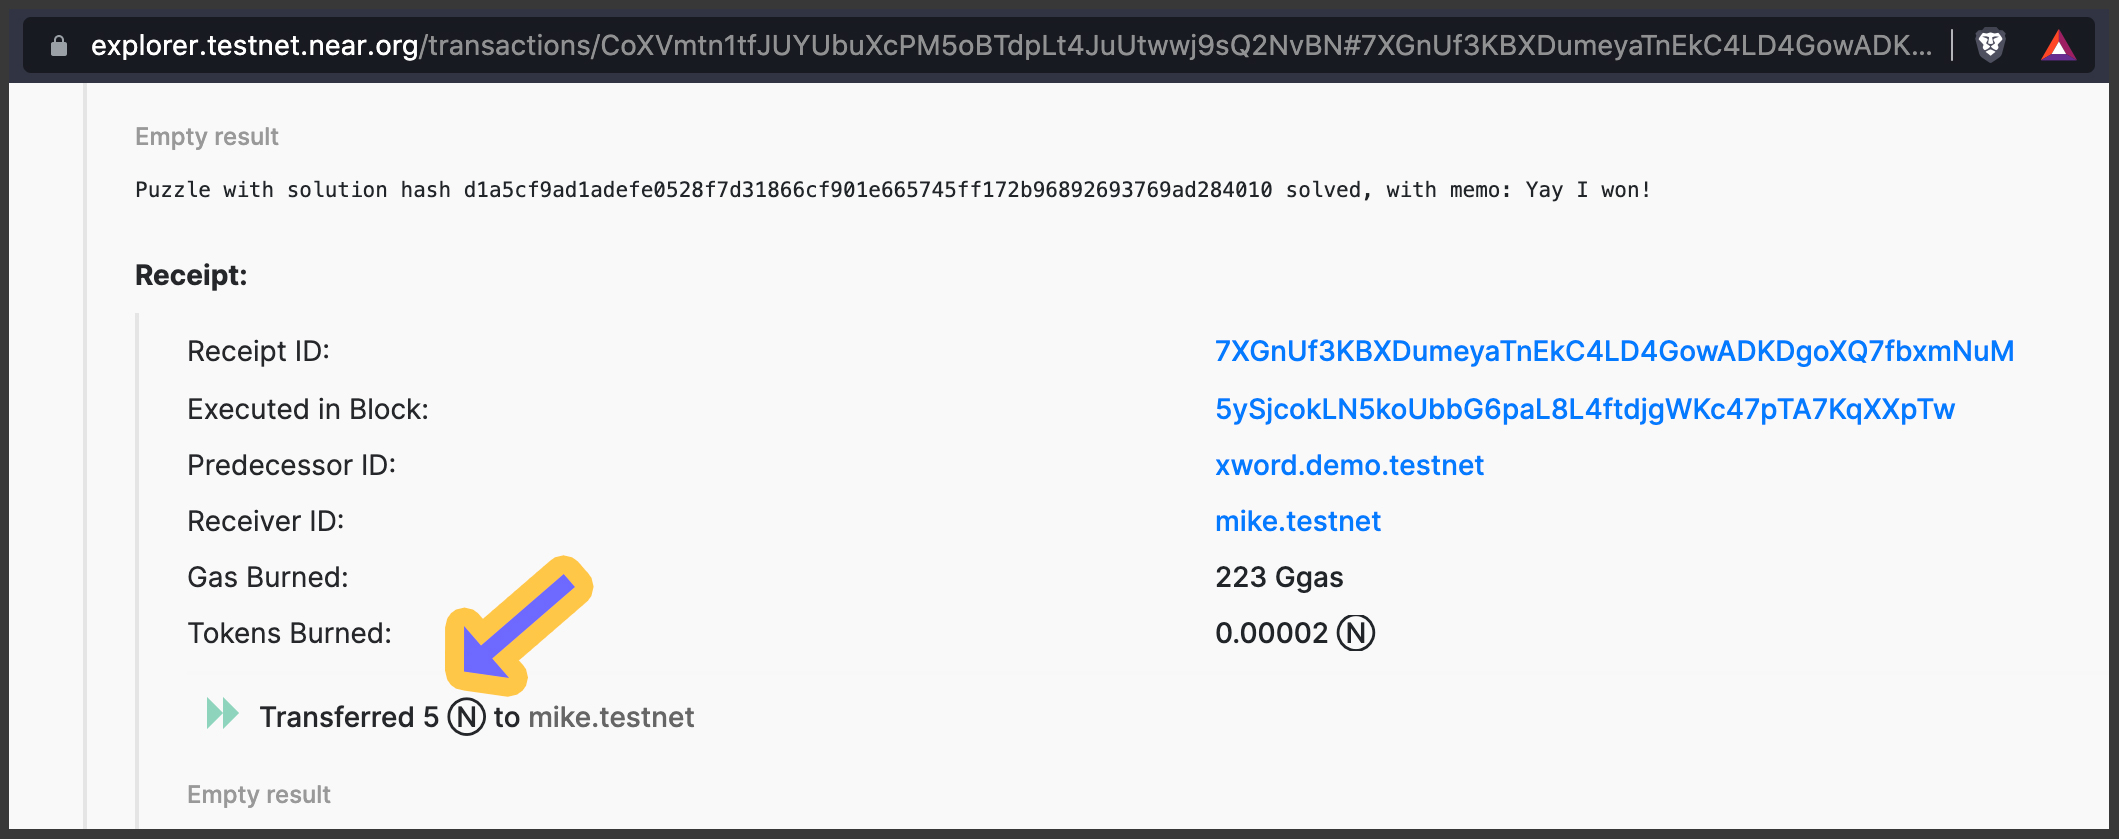
After you solve the crossword puzzle you'll see a screen with a link to NEAR Explorer to look at the details of the transaction. Notice we have our Transfer Action in there:
That's it for this chapter! As a reminder the full code is available at:
https://github.com/near-examples/crossword-tutorial-chapter-2