방명록
이 방명록 예제는 두 가지 주요 구성 요소로 이루어진 간단한 앱입니다.
- 사용자의 메시지를 저장하고 돈을 첨부할 수 있는 스마트 컨트랙트
- 게시된 마지막 10개의 메시지를 표시하는 간단한 웹 기반 프론트엔드
Obtaining the Guest book Example
You have two options to start the Guest book Example.
- You can use the app through
GitHub Codespaces, which will open a web-based interactive environment. - Clone the repository locally and use it from your computer.
| Codespaces | Clone locally |
|---|---|
🌐 https://github.com/near-examples/guest-book-examples |
Structure of the Example
The example is divided in two main components:
- The smart contract, available in two flavors: Rust and JavaScript
- The frontend, that interacts with an already deployed contract.
- 🌐 JavaScript
- 🦀 Rust
┌── sandbox-ts # sandbox testing
│    ├── src
│    │    └── main.ava.ts
│    ├── ava.config.cjs
│    └── package.json
├── src # contract's code
│    ├── contract.ts
│    └── model.ts
├── package.json # package manager
├── README.md
└── tsconfig.json # test script
┌── tests # workspaces testing
│    ├── workspaces.rs
├── src # contract's code
│    └── lib.rs
├── Cargo.toml # package manager
├── README.md
└── rust-toolchain.toml
Frontend
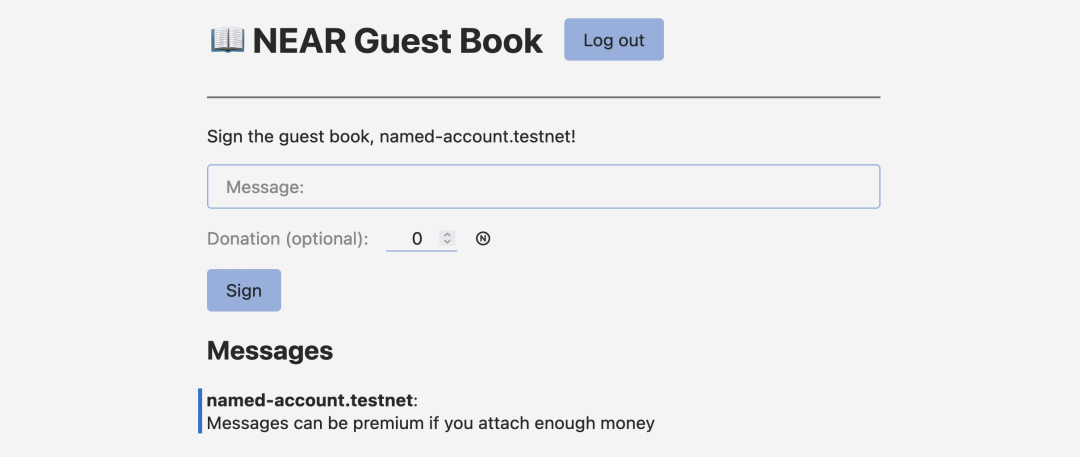
The guest book example includes a frontend that interacts with an already deployed smart contract, allowing user to sign a message.
Running the Frontend
To start the frontend you will need to install the dependencies and start the server.
cd frontend
yarn
yarn start
NEAR 계정으로 로그인하세요. 계정이 없는 경우 즉시 만들 수 있습니다. Once logged in, you will be able to sign a message in the guest book. 메시지와 함께 돈을 더 보낼 수 있고, If you attach more than 0.01Ⓝ then your message will be marked as "premium".
Understanding the Frontend
The frontend is composed by a single HTML file (/index.html) and uses REACT. Check /App.js and /index.js to understand how components are displayed in the screen.
You will notice in /src/App.jsx the following code:
- 🌐 JavaScript
loading...
It setups the necessary variables and starts the app.
Smart Contract
The contract presents 3 methods: add_message, get_message and total_messages.
- 🌐 JavaScript
- 🦀 Rust
loading...
loading...
Testing the Contract
The contract readily includes a set of unit and sandbox testing to validate its functionality. To execute the tests, run the following commands:
- 🌐 JavaScript
- 🦀 Rust
cd contract-ts
yarn
yarn test
cd contract-rs
cargo test
integration tests use a sandbox to create NEAR users and simulate interactions with the contract. :::Deploying the Contract to the NEAR network
In order to deploy the contract you will need to create a NEAR account.
- 🌐 JavaScript
- 🦀 Rust
# Optional - create an account
near create-account <accountId> --useFaucet

# Deploy the contract
cd contract-ts
yarn build
near deploy <accountId> ./build/guestbook.wasm
# Optional - create an account
near create-account <accountId> --useFaucet

# Deploy the contract
cd contract-rs
cargo near build
near deploy <accountId> ./target/wasm32-unknown-unknown/release/guestbook.wasm
CONTRACT_NAME in the index.js file. :::CLI: Interacting with the Contract
To interact with the contract through the console, you can use the following commands
# Get messages with optional arguments for pagination
near view guestbook.near-examples.testnet get_messages --args='{"from_index": "0","limit": "10"}'

# Get total number of messages
near view guestbook.near-examples.testnet total_messages

# Add a message
# Replace <accountId> with your account ID
# Required a text
# Optional deposit to make the message premium
near call guestbook.near-examples.testnet add_message '{"text":"Hello Near"}' --accountId <accountId> --deposit 0.1
guestbook.near-examples.testnet with your accountId. :::Moving Forward
A nice way to learn is by trying to expand a contract. You can modify the guestbook example to incorporate a feature where users can give likes to messages. Additionally, implement a method to toggle the like.
At the time of this writing, this example works with the following versions:
- near-cli:
4.0.13 - node:
18.19.1 - rustc:
1.77.0